
The Coat Release Method for Double Coated Dogs
Table of Contents
- Introduction
- Why Dry Brushing Alone Does Not Work
- How the Coat Release Method Works
- Step 1: Audit (Assess the Coat Before You Begin)
- Step 2: Prep (Remove Loose Coat and Address Tangles)
- Step 3: Bath (The Core of the Coat Release Method)
- Step 4: Dry (HV Dryer Finish)
- Step 5: Finish (Final Assessment and Completion)
- Which Coat Types Use the Coat Release Method
- How Often to Use the Coat Release Method
- Common Mistakes to Avoid
- Why the Coat Release Method Is Different
- The FurHQ 5-Step at a Glance for the Coat Release Method
- Related Reading
- The Bottom Line
- Variation Clarity Statement
- FAQs
 Introduction
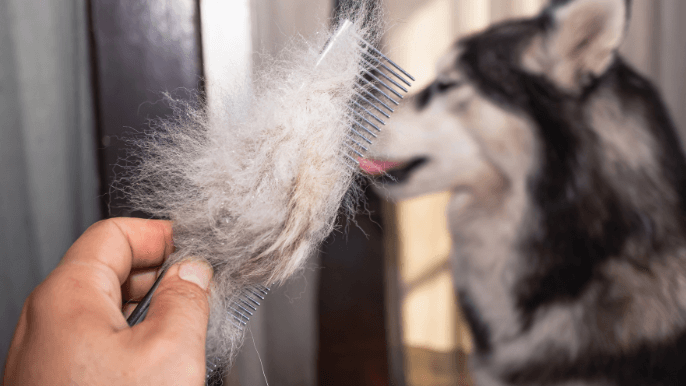
The Coat Release Method is the FurHQ bathing technique that turns bath time into your most effective deshedding session. If you have a double coated dog and you are frustrated by constant shedding despite regular brushing, you are not alone. Most pet parents assume that brushing a dry coat is the best way to remove dead undercoat . It is not. Dry brushing only addresses the surface. The dense undercoat that causes real shedding problems stays trapped against the skin, compacting over time and eventually landing on your furniture, your clothes, and in your lungs.
The Coat Release Method changes the approach entirely. Instead of fighting through a dry coat with a brush, this technique uses a specific sequence of saturation, shampoo lubrication, and controlled airflow to release dead coat safely, without friction and without skin trauma. Everything stays contained in the tub. No clouds of undercoat flying around your bathroom. No inhaling loose fur and dander. Just efficient, controlled release.
This method works for all dogs that carry undercoat, whether your dog has a Short Double Coat, a Medium Plush Double Coat, a Feathered Long Double Coat, or a Wire Coat. If your dog sheds undercoat, the Coat Release Method is how you manage it properly. The entire process follows the FurHQ 5-Step Grooming Method, Audit, Prep, Bath, Dry, Finish, giving you a structured framework that ensures nothing gets missed.
Why Dry Brushing Alone Does Not Work
Before understanding why the Coat Release Method works, it helps to understand why the standard approach falls short.
When you brush a dry double coat, you are working against the natural structure of the coat. The outer guard coat sits on top of the dense undercoat, creating a barrier. Dry brushing can pull through the guard coat and grab some loose undercoat on the surface, but it cannot reach the dead coat that is compacted against the skin. Pushing harder with the brush does not help. It just creates friction, which leads to brush burn, skin irritation, and a dog that learns to hate grooming sessions.
Double coated dogs shed from the undercoat outward. Dead coat loosens from the follicle and migrates through the coat layers until it either falls out naturally or gets trapped in the denser areas. In heavy coated breeds, much of that dead coat never makes it to the surface on its own. It stays packed against the skin, creating density that blocks airflow, traps heat, and leads to skin irritation.
The Coat Release Method solves this by working with the coat instead of against it.
How the Coat Release Method Works
This technique is built on one core principle: dead coat releases most efficiently when the coat is lubricated and airflow is applied.
When shampoo coats each hair shaft, it breaks down the oil, debris, and compaction that hold dead coat in place. The lubrication reduces friction between hairs, allowing dead coat to separate from the live coat without resistance. Adding controlled airflow at this stage physically moves through the coat layers, lifting dead undercoat away from the skin and pushing it to the surface where it can be rinsed away.
This is not aggressive deshedding. The method does not rip coat out or force anything. It creates the conditions for dead coat to let go naturally. The airflow does the work. The shampoo provides the slip. The dead coat releases because it is ready to release, not because it was torn free.
This is the difference between safe coat management and the kind of harsh mechanical removal that damages skin and destroys coat structure.
Step 1: Audit (Assess the Coat Before You Begin)
Every grooming session starts with the Audit. Before your dog goes anywhere near water, take a few minutes to evaluate what you are working with.
Run your hands through the coat from head to tail, feeling for areas of dense, packed undercoat. Check behind the ears, the chest, the underside, the rear end, and anywhere coat grows thickest. You are looking for how much dead coat is sitting in the coat and whether there are any mats or tangles that need attention before the bath.
If you find tangles, particularly in feathered areas on Feathered Long Double Coats or in the furnishings on Wire Coats, note where they are. Small tangles can often be worked through during the Prep phase. Mats that are tight to the skin may need professional attention before proceeding.
The Audit also helps you plan your session. A dog with heavy dead coat will need thorough airflow work during the Bath phase. A dog with a lighter coat load may move through the process more quickly. Knowing what you are dealing with before you start prevents surprises.
What to look for during the Audit:
- Packed undercoat that feels dense and tight near the skin
- Tangles or early mat formation, especially behind the ears, in the armpits, and around the collar area
- Skin condition, including any redness, irritation, or sensitivity
- Areas where dead coat is already pulling free easily, indicating heavy coat release is imminent
- Overall coat condition to determine how much airflow and brush-through work the Bath phase will require
Step 2: Prep (Remove Loose Coat and Address Tangles)
The Prep phase gets the coat ready for the bath. Working through the coat before it gets wet prevents tangles from tightening in water and ensures shampoo can reach the skin during the release process.
Use your rubber curry to work through the coat in sections, loosening surface debris and dead coat that is ready to release. For Short Double Coats and Medium Plush Double Coats, the rubber curry is typically all you need. For Feathered Long Double Coats and Wire Coats, use your slicker brush on feathered areas and furnishings where tangles are most likely to form.
Work methodically from rear to front, covering the entire coat. Pay extra attention to the areas you identified during the Audit. If you encounter tangles, work them out gently with your slicker using short, controlled strokes. Do not force through knots, as this causes discomfort and skin trauma.
The Prep phase is not about achieving a perfectly smooth coat. It is about removing enough loose coat and addressing enough tangles that the Bath phase can do its job effectively. A few minutes of thorough prep work makes every step that follows more productive.
Prep essentials:
- Rubber curry for general coat work on body coat
- Slicker brush for feathered areas, furnishings, and tangles
- Work in sections from rear to front
- Remove loose coat and debris
- Address tangles before they tighten in water
Step 3: Bath (The Core of the Coat Release Method)
The Bath phase is where the real release work happens. This is the heart of the method, and it follows a specific sequence designed to maximise dead coat removal using shampoo lubrication and controlled HV dryer airflow.
Gather everything within reach before you begin. You do not want to leave a wet, soapy dog to search for supplies.
Equipment checklist:
- High Velocity (HV) Dryer: This is not optional for the full Coat Release Method. A household blow dryer cannot produce the airflow needed to penetrate a double coat. The HV dryer creates concentrated air that moves through the coat layers to physically release dead undercoat. If you do not have an HV dryer yet, see the modified version in Related Reading that replaces the airflow phase with brush-through techniques
- Rubber Curry: Your primary tool for distributing shampoo to the skin and providing gentle mechanical assist during the second shampoo phase
- Slicker Brush (for the mechanical assist phase only): Used with feather-light pressure when dense coat remains after the rubber curry step. This is not used in every session and requires careful technique
- Coat-matched Shampoo: Use the shampoo designed for your dog's coat type. The shampoo needs to reach the skin, not just foam on the surface
- Coat-matched Conditioner: All coats with undercoat are conditioned after the release phases, with levels adjusted by coat type
- Drain Filter: Dead coat will fill your drain quickly. Always have a filter in place and clean it during the bath as needed. Drain filters are inexpensive and available at most hardware stores. A simple mesh or silicone filter is all you need
- Towels: For initial drying before the HV dryer phase
Full Saturation: Foundation of Release
Thoroughly wet the coat to the skin, pushing water through all coat layers. Do not proceed until the skin is fully wet.
This is not a quick rinse. On a thick double coat, full saturation can take several minutes. Work the water into the coat with your hands, lifting and separating the coat as you go. Pay particular attention to the chest, behind the ears, the underside, and the rear end where coat is typically densest.
Dry pockets block shampoo penetration and prevent proper release. If shampoo cannot reach the skin, this method cannot work effectively. Every step that follows depends on complete saturation first.
Shampoo Application: Emulsification Phase
Apply coat-matched shampoo and distribute it through the coat using your rubber curry. Focus on skin contact, not surface foam.
Work in sections, starting from the rear and moving forward. The rubber curry does two things here: it pushes shampoo down to the skin where it needs to be, and it begins loosening debris and dead coat through gentle circular motions. You should feel the curry contacting the skin through the coat, not just gliding over the top layer.
Shampoo breaks down oil, debris, and compacted coat so release can occur. Surface foam means nothing. What matters is that the shampoo reaches the skin and coats the undercoat hairs where dead coat is trapped.
Airflow on the Shampooed Coat: The Release Phase
With shampoo still in the coat, use controlled airflow from your HV dryer in the tub. Work methodically, section by section.
This is the core of the release phase. Start at the rear end and work toward the head. The rear is the least sensitive area and gives your dog time to adjust to the sensation. Move the nozzle steadily through the coat, directing airflow into the coat layers rather than skimming across the surface. You will see dead coat and debris releasing into the tub.
Work in a pattern. Do not jump randomly from area to area. Methodical movement ensures every section receives adequate airflow. Watch for dead coat lifting to the surface and separating. This is the method working exactly as intended.
Airflow combined with lubrication allows dead coat to release safely without friction or skin trauma. The shampoo slip prevents the air from creating tangles or mats. Dead coat releases while contained in the tub, keeping your bathroom clean and your lungs clear.
Full Rinse: Clear What Was Released
Rinse thoroughly to remove shampoo, released coat, and debris.
Take your time here. Run your fingers through the coat while rinsing to help flush loosened coat out. Check the drain filter and clean it if it is getting full. You will likely be surprised by the volume of dead coat that has released during the airflow phase.
What has been released must be removed before continuing. Leaving loosened coat and shampoo residue in the coat blocks the effectiveness of the second shampoo application.
Second Shampoo and Controlled Mechanical Assist
Apply shampoo again and use mechanical assist to complete the release.
Re-wet the coat if needed before applying the second shampoo. This application is about finishing what the airflow phase started. You have two options for mechanical assist, and your tool choice depends on how the coat responded to the first phase.
Option A: Rubber Curry. Use this when the airflow release was strong or skin sensitivity is a concern. The rubber curry moves shampoo to the skin, encourages final release, and carries no risk to the skin. This is the safer choice and should be your default.
Option B: Slicker Brush (light hand only). Use this when dense coat remains and additional mechanical help is needed. This requires careful technique. Use feather-light pressure only. Work in short, controlled strokes. Never stay in one area for extended passes. If the skin begins to pink, stop immediately. Slicker brushes remove more coat than a curry, which is why control is essential. This technique relies on precision, not force.
This step completes release while the coat remains lubricated. The shampoo slip protects the skin and coat during any mechanical work. Without lubrication, a slicker brush creates friction that leads to brush burn.
Full Rinse: End of the Release Phase
Rinse completely until the coat is clean and residue-free. Run your fingers through the coat to confirm all shampoo and loosened coat has been removed.
This rinse must be thorough. Any remaining shampoo interferes with skin comfort and coat structure. The coat should feel clean between your fingers with no slippery residue remaining. Residual shampoo causes skin irritation, itching, and can affect how conditioner performs in the next step.
Conditioning
Conditioning is not part of the release process itself, but it is standard FurHQ practice that follows every bath session. All coats with undercoat are conditioned, with the level and placement adjusted by coat type.
Apply conditioner where the coat benefits. Use only what the coat type requires. The rubber curry can be used to distribute conditioner through the coat, just as it was used during shampoo application.
Conditioning by coat type:
- Short Double Coats: Light conditioning, primarily for skin comfort and coat balance
- Medium Plush Double Coats: Moderate conditioning to support manageability without creating excess softness
- Feathered Long Double Coats: Conditioning focused on feathered areas where tangles are most likely, while keeping the body coat balanced
- Wire Coats: Condition lightly and selectively, typically limited to furnishings and friction-prone areas, while preserving structure and texture on the body coat
Over-conditioning can interfere with coat structure, particularly on wire coats and dense double coats.
Final Rinse
Rinse thoroughly after conditioning. The coat should feel clean and balanced, not slick. If the coat still feels slippery after rinsing, rinse again. Product left in the coat weighs it down and attracts dirt.
Step 4: Dry (HV Dryer Finish)
Towel dry first to remove excess water, pressing the towel into the coat rather than rubbing aggressively. Then complete drying with your HV dryer.
Because the release phases have already removed the bulk of dead undercoat, drying is faster and more efficient. The coat is cleaner, lighter, and less dense, which means airflow moves through it more effectively during the drying phase.
Work methodically with the HV dryer, directing airflow with the direction of coat growth. Start at the rear and work forward, just as you did during the release phase. The drying phase provides an additional opportunity to catch any dead coat that was loosened but not fully removed during the Bath phase.
Drying by coat type:
- Short Double Coats: The HV dryer alone typically completes the job. The shorter coat length and tighter structure mean less area for dead coat to hide in after the bath phases
- Medium Plush Double Coats: Once the coat reaches approximately 90 percent dry, you can use your slicker brush with the airflow in the direction of coat growth to pull out any remaining dead coat
- Feathered Long Double Coats: Same approach as Medium Plush, with additional attention to feathered areas on the legs, chest, belly, and tail. The slicker at 90 percent dry catches remaining loose undercoat in the longer coat
- Wire Coats: The HV dryer alone typically completes drying. Avoid heavy slicker work during drying to preserve the topcoat texture
Use light pressure during any slicker work in the Dry phase and always work with the direction of coat growth. This final drying step catches anything the tub work missed.
Step 5: Finish (Final Assessment and Completion)
The Finish phase completes the session and confirms results.
Once the coat is fully dry, run your hands through it from head to tail, just as you did during the Audit. You should feel a noticeable difference in density. The coat should feel lighter, cleaner, and more open than before the session. This final hands-on check confirms that dead coat has been effectively released.
Compare what you are feeling now to what you felt during the Audit. The areas that were dense and packed should now feel significantly lighter. If any areas still feel heavy with undercoat, note them for your next session. Some heavily packed coats may need two or three sessions spaced two weeks apart to fully clear compacted dead coat that has been building for months.
The Finish phase is also your opportunity to check the skin. Run your fingers along the skin surface to confirm there is no irritation, pinking, or sensitivity from the session. Healthy skin after a properly executed session should look clean, calm, and comfortable.
What to check during the Finish:
- Overall coat density compared to the Audit (should be noticeably lighter)
- Any remaining areas of packed undercoat for next session
- Skin condition (should be clean and calm with no pinking or irritation)
- Coat texture and balance (should feel clean and natural, not slick or weighed down)
- Your dog's comfort level and demeanour
Which Coat Types Use the Coat Release Method
The Coat Release Method is designed specifically for dogs that carry undercoat. This includes all FurHQ double coat classifications and wire coats.
Short Double Coat breeds carry a short topcoat under one inch with a dense undercoat. These breeds benefit because the tight coat structure traps dead undercoat close to the skin where dry brushing cannot reach effectively.
Medium Plush Double Coat breeds have a medium length topcoat with substantial undercoat. This technique is particularly effective here because the coat density makes dry deshedding difficult and time consuming.
Feathered Long Double Coat breeds carry a longer topcoat with undercoat and feathering on the legs, chest, belly, and tail. This technique works on the double coated body areas while the feathered areas receive separate attention during conditioning and drying.
Wire Coat breeds carry a harsh, wiry topcoat over a dense undercoat. The technique releases the dead undercoat beneath the wire texture without disturbing the topcoat structure. Conditioning on wire coats is applied selectively, typically limited to furnishings and friction-prone areas, to preserve the wire texture on the body.
The Coat Release Method is not used on Smooth Single Coats, Curly Wavy Coats, or Drop Coats. These coat types do not carry the undercoat structure that this technique is designed to address, or they require different bathing approaches suited to their specific coat behaviour.
Not sure which coat type your dog has? Upload a photo to the FurHQ AI Coat Identifier and it will tell you your dog's coat type and the kit that matches.
How Often to Use the Coat Release Method
Frequency of the coat release method depends on your dog's coat type, shedding cycle, and lifestyle.
During seasonal coat changes in spring and autumn, most double coated dogs benefit from the Coat Release Method every two to four weeks. This is when dead undercoat production is highest and regular release prevents the compaction that leads to matting , hot spots, and excessive household shedding. During blow-out season, this is where the real coat work lives. Stay ahead of undercoat release early, and the rest of the year stays easy.
Outside of seasonal transitions, monthly sessions are typically sufficient for most double coated breeds. Some breeds with particularly dense coats may benefit from more frequent sessions, while lighter double coats may need sessions less often.
Watch your dog's coat for signs that a session is needed:
- Loose undercoat pulling free easily when you run your fingers through the coat
- Coat that feels dense or packed near the skin
- Increased household shedding on furniture, clothing, and floors
- Dead coat visible when you part the coat and look at the undercoat layer
- The coat feels heavier or thicker than usual despite regular brushing
Common Mistakes to Avoid
Even with a clear process, there are mistakes that reduce the effectiveness of this method or create problems.
Skipping the Audit. Starting the bath without assessing the coat means you do not know what you are working with. The Audit tells you where the heaviest dead coat is sitting, whether tangles need attention before the coat gets wet, and how much airflow work the Bath phase will require.
Skipping full saturation. Rushing through the initial wetting is one of the most common mistakes. If the coat is not wet to the skin, shampoo cannot penetrate and the airflow phase will not release effectively. Take the time to fully saturate before applying shampoo.
Using a household blow dryer instead of an HV dryer. Household dryers cannot produce the concentrated airflow needed to move through a double coat. They blow warm air across the surface without penetrating. This method requires an HV dryer. There is no substitute for the full version. If you do not have an HV dryer, use the modified brush-through version instead.
Applying too much pressure with the slicker brush. During the mechanical assist phase, the slicker brush must be used with feather-light pressure. If you are pressing into the coat, you are pressing too hard. The shampoo slip does most of the work. The brush assists. If the skin pinks, stop.
Forgetting the drain filter. The coat release method removes significant amounts of dead coat. Without a drain filter, you will clog your plumbing. Place the filter before you start and clean it during the session as needed.
Rushing the rinses. Both rinse phases must be thorough. Shampoo residue blocks the next step and irritates the skin. Released coat that is not rinsed away redeposits in the coat. Take the time to rinse completely.
Skipping the second shampoo. The first shampoo and airflow phase does the heavy lifting, but the second shampoo with mechanical assist finishes the job. Skipping it means leaving release potential on the table.
Skipping the Finish assessment. The Finish phase is not optional. Running your hands through the dried coat confirms that the method did its job and identifies any areas that need attention at the next session.
Why the Coat Release Method Is Different
The Coat Release Method is not a standard bath with extra steps. It is a fundamentally different approach to coat management.
Standard bathing cleans the coat. This method cleans the coat and releases dead undercoat simultaneously, using the bath environment to contain everything. Standard deshedding involves dry brushing, which works against the coat structure and creates friction. This method works with the coat structure, using lubrication and airflow to create the conditions for safe release.
This is why professional groomers can send your dog home with dramatically less shedding after a single visit. They are not using magic. They are using techniques like the Coat Release Method to access and remove dead coat that dry brushing at home simply cannot reach.
Now you have the same method. The FurHQ 5-Step Grooming Method, Audit, Prep, Bath, Dry, Finish, gives you the framework to execute it consistently every time.
The FurHQ 5-Step at a Glance for the Coat Release Method
This coat release method maps directly onto the FurHQ 5-Step Grooming Method. Here is the complete flow at a glance.
Audit: Run your hands through the coat. Feel for packed undercoat, tangles, and coat density. Identify problem areas and plan your session.
Prep: Remove loose surface coat with the rubber curry. Address tangles with the slicker brush. Get the coat ready so shampoo can reach the skin.
Bath: Full saturation, first shampoo with rubber curry distribution, HV airflow on the shampooed coat for release, full rinse, second shampoo with mechanical assist (curry or slicker), full rinse, condition by coat type, final rinse.
Dry: Towel dry, then HV dryer to complete drying. For Medium Plush and Feathered Long Double Coats, slicker brush at 90 percent dry with airflow in the direction of coat growth.
Finish: Final hands-on assessment to confirm dead coat removal and check skin condition. Compare coat density to the Audit. Note any areas for next session.
Related Reading
- The Coat Release Method Without an HV Dryer
- How to Dry a Dog After a Bath
- High Velocity Dryer for Dogs
- Stand Dryer for Dogs
- Neck Dryer for Dogs
- How to Introduce Your Dog to a Dryer
- How to Line Brush Your Dog
- Touch Test for Dogs
- How Often Should You Bathe Your Dog Based on Coat Type
The Bottom Line
The Coat Release Method gives you a professional level deshedding technique you can use at home with the right tools and a clear process. If your double coated dog sheds constantly despite regular brushing, the problem is not that you are not brushing enough. The problem is that brushing alone cannot reach the dead undercoat trapped against the skin.
The FurHQ 5-Step Grooming Method gives this process structure. Audit the coat so you know what you are working with. Prep by removing loose coat and addressing tangles. Bath with full saturation, shampoo lubrication, HV airflow release, and mechanical assist. Dry with your HV dryer, catching remaining dead coat at 90 percent dry. Finish with a hands-on assessment that confirms results and identifies areas for next time.
Every FurHQ Starter Grooming Kit: Short Double Coat, FurHQ Starter Grooming Kit: Medium Plush Double Coat, FurHQ Starter Grooming Kit: Feathered Long Double Coat, and FurHQ Starter Grooming Kit: Wire Coat includes the rubber curry, coat-matched shampoo, conditioner, and brushing tools you need for your dog's specific coat type, plus access to step by step video tutorials that walk you through the entire process. You do not have to figure this out alone.
You got this. And we have got you. 🐾
Variation Clarity Statement
Every dog is an individual. Coat density, shedding patterns, skin sensitivity, and tolerance levels vary even within the same breed. The information in this blog represents general guidance based on coat type classifications. Your dog's specific needs may require adjustments to frequency, tool selection, or technique. When in doubt, consult a Certified Professional Groomer familiar with your dog's coat type. If you are unsure about your dog's coat type, use the FurHQ AI Coat Identifier to get accurate identification and the right kit recommendation.
FAQs
What is the Coat Release Method?
The Coat Release Method is a bathing technique that uses shampoo lubrication and controlled HV dryer airflow to release dead undercoat during the bath. Shampoo coats each hair shaft and breaks down the compaction that holds dead coat in place. HV airflow then moves through the lubricated coat layers, physically lifting dead undercoat away from the skin where it can be rinsed away. Everything stays contained in the tub.
Which coat types use the Coat Release Method?
The Coat Release Method works on any coat type that carries undercoat. This includes Short Double Coats, Medium Plush Double Coats, Feathered Long Double Coats, and Wire Coats. It does not apply to Smooth Single Coats, Curly Wavy Coats, or Drop Coats, as these coat types do not carry the undercoat structure that this technique is designed to address.
Can I use the Coat Release Method on a Smooth Single Coat, Curly Wavy Coat, or Drop Coat?
No. Smooth Single Coats do not carry the dense undercoat that the Coat Release Method is designed to release. Curly Wavy Coats and Drop Coats require different bathing approaches suited to their specific coat structure and behaviour. The Coat Release Method is specifically designed for coats that carry undercoat beneath a topcoat, which includes Short Double Coats, Medium Plush Double Coats, Feathered Long Double Coats, and Wire Coats. Each FurHQ Starter Grooming Kit includes the tools and techniques matched to your specific coat type.
Why do I need an HV dryer for the Coat Release Method?
A high velocity dryer produces concentrated airflow that penetrates through all layers of a double coat simultaneously. Household blow dryers cannot generate this level of airflow. They push warm air across the surface without reaching the undercoat where dead coat is trapped. The HV airflow on a shampooed coat is what makes the core release phase possible. If you do not have an HV dryer, there is a modified version that uses brush-through techniques instead of airflow.
How often should I use the Coat Release Method?
During seasonal coat changes in spring and autumn, most double coated dogs benefit from a Coat Release Method session every two to four weeks. Outside of seasonal transitions, monthly sessions are typically sufficient. Watch for signs that a session is needed: increased household shedding, loose undercoat that pulls free easily, or a coat that feels dense and packed near the skin.
Can the Coat Release Method replace regular brushing?
No. The Coat Release Method and regular brushing serve different purposes. Regular brushing maintains the coat between baths by removing surface debris, preventing tangles, and distributing natural oils. The Coat Release Method addresses the deep undercoat that regular brushing cannot reach. Both are essential parts of a complete coat management system. Your FurHQ Starter Grooming Kit includes the brushing tools you need for your dog's coat type.
Is the Coat Release Method safe for puppies?
Puppies can be introduced to a modified version of the Coat Release Method once they are comfortable with bathing and have been properly desensitized to the HV dryer. Most puppies under six months do not yet carry the dense undercoat that requires this technique. Start with standard baths and gentle dryer introduction first. As the adult coat develops and undercoat increases, gradually introduce the full Coat Release Method.
What if my dog is afraid of the HV dryer?
Dryer desensitization must happen before attempting the Coat Release Method. Never force an HV dryer on a fearful dog. Start with the dryer off and reward your dog for being near it. Gradually increase exposure by turning it on at the lowest setting away from your dog, then closer over multiple sessions. The Coat Release Method only works when your dog is comfortable enough to stand calmly during the airflow phase. Rushing this process creates negative associations that make every future session harder.
When should I use the slicker brush versus the rubber curry in Step 5?
Default to the rubber curry. It is the safer option and carries no risk to the skin. Use the slicker brush only when dense coat remains after the rubber curry and additional mechanical help is clearly needed. If you are unsure, use the curry. Slicker brushes remove more coat but require careful technique with feather-light pressure, short controlled strokes, and constant monitoring for skin pinking. The rubber curry is always the right choice for sensitive dogs or when release has already been strong.
How do I know the Coat Release Method is working?
You will see dead coat and debris releasing into the tub during the airflow phase. The water will become cloudy with loosened undercoat. Your drain filter will collect visible amounts of dead coat. After drying, the coat will feel noticeably lighter and less dense. Household shedding will decrease measurably in the days following a Coat Release Method session. If you do not see significant release, the most common cause is incomplete saturation in Step 1.
Can I do a third shampoo if my dog is very dirty?
Yes. If the coat is heavily soiled or your dog has not had a Coat Release Method session in a while, a third shampoo may be needed. Repeat the rubber curry technique from Step 5 during the third application. The additional shampoo and mechanical work addresses coat that was too compacted to release in the first two rounds. Always follow with a thorough rinse.
Does the Coat Release Method work in a regular bathtub?
Yes. The Coat Release Method works in any tub, shower, or bathing station where you have room to work and access to your HV dryer. The key requirements are water for saturation and rinsing, space to manoeuvre the HV dryer around the dog, and a drain filter to catch released coat. A raised tub or bathing station is easier on your back for larger dogs, but the method itself works in any bathing environment.
Why does the shampoo stay in the coat during the airflow phase?
The shampoo serves a critical purpose during the airflow phase. It coats each hair shaft with lubrication that reduces friction between hairs, allowing dead coat to separate and release when airflow moves through the coat. Without this lubrication, airflow alone would create tangles and resistance rather than clean release. The shampoo slip is what makes the Coat Release Method different from simply blowing a dry or wet coat with a dryer.
How long does the Coat Release Method take?
The complete Coat Release Method takes approximately 30 to 60 minutes depending on the size of your dog, the density of the coat, and how much dead coat is present. Larger breeds with heavy coats take longer. The first session typically takes the longest because there is often accumulated dead coat that has not been addressed before. Subsequent sessions become faster as you maintain a regular schedule.
What should I do if the skin starts to pink during brushing?
Stop immediately. Pinking skin means you are applying too much pressure or staying in one area too long. Switch to the rubber curry for the remainder of that session. The Coat Release Method should never cause skin irritation. If pinking occurs, the brush was being used too aggressively. Remember that the shampoo and airflow do most of the work. The mechanical assist in Step 5 is exactly that, an assist, not the primary release tool.
What tools do I need for the Coat Release Method and where can I get them?
The FurHQ Starter Grooming Kit for your dog's coat type includes the core tools for the Coat Release Method, including the rubber curry, coat-matched shampoo, and conditioner. The HV dryer is available separately at the FurHQ Store. Every kit comes with access to step by step video tutorials that show you exactly how to perform the Coat Release Method on your specific coat type. Not sure which kit you need? Use the FurHQ AI Coat Identifier to find your dog's coat type and matched kit, or try the FurHQ Breed Selector to learn more about your breed's specific grooming requirements.
Why are there two shampoo applications in the Coat Release Method?
The first shampoo application combined with HV airflow does the heavy lifting, breaking down compaction and releasing the bulk of dead undercoat. The second shampoo with mechanical assist (rubber curry or slicker brush) finishes the job, reaching dead coat that was too compacted to release during the first round. Skipping the second application leaves dead coat behind that was starting to release.
What is the difference between Option A and Option B during the second shampoo?
Option A uses the rubber curry for mechanical assist. It is the safer default choice and carries no risk of skin irritation. Option B uses the slicker brush for additional mechanical release when dense coat remains. The slicker requires feather-light pressure, short controlled strokes, and constant monitoring for skin pinking. If the skin begins to show any redness, stop immediately and return to the curry.
Can I use the Coat Release Method without an HV dryer?
Yes. There is a modified version that replaces the HV airflow phase with brush-through techniques using the rubber curry and slicker brush on the shampooed coat, and uses towel drying and air drying instead of HV drying. The modified version is effective but does not release as much dead coat per session as the full version with the HV dryer.
What is the FurHQ 5-Step Grooming Method?
The FurHQ 5-Step Grooming Method is Audit, Prep, Bath, Dry, Finish. It provides structure for every grooming session so nothing gets missed. The Audit assesses the coat before you start. The Prep phase removes loose coat and addresses tangles. The Bath phase handles cleansing and, for the Coat Release Method, the shampoo lubrication and airflow release sequence. The Dry phase completes moisture removal. The Finish phase confirms results with a final hands-on assessment.
Do I need to condition after the Coat Release Method?
Yes. All coats with undercoat benefit from conditioning after the release phases, with levels adjusted by coat type. Short Double Coats receive light conditioning for skin comfort. Medium Plush Double Coats receive moderate conditioning for manageability. Feathered Long Double Coats receive conditioning focused on feathered areas. Wire Coats receive selective conditioning on furnishings and friction-prone areas only, preserving texture on the body coat.
How do I know if the Coat Release Method is working?
You will see dead coat and debris releasing into the tub during the airflow phase and filling the drain filter. After the session, during the Finish phase, the coat should feel noticeably lighter, cleaner, and more open compared to what you felt during the Audit. Household shedding should decrease in the days following the session.
Why is the Audit important before starting the Coat Release Method?
The Audit is the first step of the FurHQ 5-Step Grooming Method and it tells you exactly what you are working with before any water touches the coat. Feeling the coat lets you identify where the heaviest dead coat is sitting, whether tangles need attention before the bath, and how much airflow work the Bath phase will require. It also creates a baseline so you can compare results during the Finish phase.