
Dog Nail Trimming - How to Calm Nervous Dogs at Home
Table of Contents
- Introduction
- Before You Start: Assess Your Own Energy
- Why Nail Trimming Feels More Stressful Than Other Grooming
- Never Force a Dog to Submit for Nail Trimming
- The FurHQ 5-Step Grooming Method: Technical Reality
- Choosing the Right Tools
- Preparing the Environment for Success
- Gradual Desensitisation for Nervous Dogs
- Step-by-Step Dog Nail Trimming Technique
- Understanding the Quick and Preventing Injury
- Positive Reinforcement During Dog Nail Trimming
- How Often to Trim
- When to Seek Professional Help
- Alternative Nail Maintenance Methods
- Common Mistakes to Avoid
- Building Long-Term Cooperation
- Mondo's Pro Tip
- Related Reading
- The Bottom Line
- Variation Clarity Statement
- FAQs
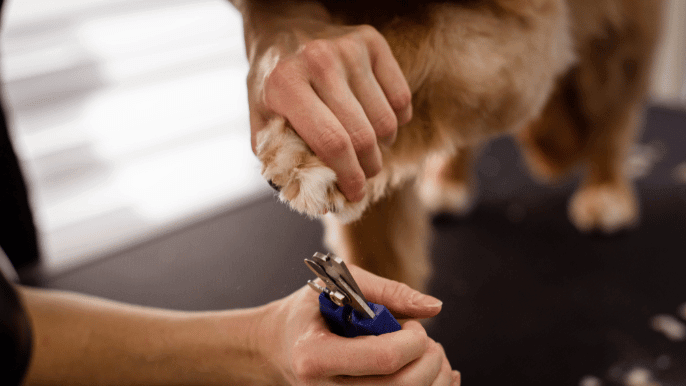 Introduction
Dog nail trimming causes anxiety for countless pet parents whose dogs become tense, resistant, or visibly distressed the moment their paws are touched. What should be simple maintenance feels impossible without professional help or sedation.
The task feels intimidating because it involves sensitive body parts, sharp tools, fear of causing pain by cutting the quick, and dogs who remember every uncomfortable past experience.
This guide explains how to approach dog nail trimming for nervous dogs using gradual desensitisation, proper handling techniques, appropriate tools, and realistic expectations that prioritise your dog's emotional comfort over rushing to finish.
Before You Start: Assess Your Own Energy
This section comes first for a reason. Your emotional state is the single biggest factor in whether dog nail trimming goes well or badly.
Dogs read human body language and tension with extraordinary accuracy. They feel the change in your grip when you are nervous. They notice when your breathing quickens. They sense the difference between a relaxed hand and a hand bracing for conflict.
If you approach nail trimming feeling anxious, rushed, or frustrated, your dog absorbs that energy and becomes more resistant. You cannot hide your stress from your dog.
Be honest with yourself. If the thought of trimming your dog's nails makes your stomach tighten, if your hands feel unsteady, if you are already dreading a struggle before you have even picked up the clippers, your dog will mirror that anxiety.
If you are not comfortable with this job, it is best to get a professional to do it. There is no shame in this decision. Many experienced dog owners choose professional nail care because they recognise that their own anxiety transfers directly to their dog.
Before every session, check in with yourself. Take a few slow breaths. If today is not a good day for you, it is not a good day for dog nail trimming either.
Why Nail Trimming Feels More Stressful Than Other Grooming
Dog nail trimming feels different to dogs than brushing or bathing because paws are neurologically sensitive and directly tied to balance, movement, and survival instincts.
Physical Sensitivity
Paws contain concentrated nerve endings that detect texture, temperature, and pressure. Lifting a paw or changing weight distribution triggers immediate awareness and potential discomfort.
Loss of Control
When you hold a paw, your dog loses balance and control over that leg. This vulnerable position naturally creates anxiety, especially in dogs who have experienced pain, been restrained forcefully, or had nails cut too short in the past.
Unpredictable Sensations
The pressure of clippers, vibration of grinders, and sound of tools cutting through nail create sensations dogs cannot predict or control. Nervous dogs often react to anticipation of discomfort rather than actual pain.
Never Force a Dog to Submit for Nail Trimming
This is the most important section in this guide.
Never strong-arm, pin down, or physically force a dog to submit for dog nail trimming. This is not a technique. It is not "getting the job done." It creates lasting psychological damage that can take months or years to overcome. In some dogs, the damage is permanent.
A dog who is forcefully restrained during nail trimming learns that paw handling means fear, pain, and loss of control. That single experience can permanently imprint a fear response that affects every future grooming session, veterinary visit, and even casual paw handling at home.
The dog does not forget. The dog does not "get over it." The dog simply learns that humans cannot be trusted with their paws.
What Forcing Looks Like
Pinning the dog down while they struggle. Holding the dog in a headlock or body lock. Having multiple people restrain the dog while one person clips. Continuing to trim while the dog is thrashing, crying, or trying to escape. Muzzling a panicked dog and pressing on. Scolding or punishing the dog for pulling away.
What It Costs
Trust. Future cooperation. The ability to do basic paw checks. Calm veterinary examinations. Your relationship with your dog.
What to Do Instead
Stop. If your dog is struggling, panicking, or trying to escape, the session is over. No nail is worth your dog's trust.
Come back another day with a smaller goal. If desensitisation is not working after consistent effort, seek professional help. A professional groomer or veterinarian has the tools, experience, and environment to handle the task safely without creating trauma.
The FurHQ 5-Step Grooming Method: Technical Reality
Dog nail trimming fits within the FurHQ 5-Step Grooming Method (Audit, Prep, Bath, Dry, Finish), typically during the Prep or Finish phase.
"Learn the Method. Follow the Protocol. Complete the Mission."
Audit
Start every grooming session with a full health check. Run your hands over the entire dog. Check for lumps, bumps, and any changes in skin condition. Check the ears for signs of infection, smell, or buildup. Look at the nails for overgrowth or splitting. Check teeth and gums for tartar or inflammation.
For nails specifically, look at your dog's feet while they stand on a flat surface. Nails should not touch the ground. Check for cracked, split, or ingrown nails.
The Audit also assesses your dog's current mood and energy. If your dog is already anxious or overstimulated, postpone nail work to another session. The FurHQ Touch Test helps you assess both physical and emotional readiness.
Prep or Finish
Nail trimming can happen during Prep before the bath (especially if you plan to trim paw pad hair at the same time) or during Finish after the coat is clean and dry.
Many groomers prefer the Finish phase because the dog has already been through the bath and drying and may be calmer or more tired.
Standalone Sessions
For nervous dogs, dog nail trimming often works best as a standalone session rather than adding it to a full grooming appointment. A short, calm session focused only on nails avoids accumulated stress.
You got this.
Choosing the Right Tools
The tools you select significantly impact how your dog experiences dog nail trimming.
Clipper Types
| Type | Best For | Notes |
|---|---|---|
| Guillotine clippers | Small to medium nails | Blade slides across as you squeeze |
| Scissor-style clippers | Thick nails needing control | Cut like scissors; good visibility |
| Plier-style clippers | Large breeds with thick nails | Strong cutting power |
Grinder Options
Nail grinders file the nail gradually using a rotating stone or sandpaper drum. They allow precise control and eliminate the risk of cutting too short in one clip. However, vibration and noise overwhelm some nervous dogs.
Tool Quality Matters
Dull clippers squeeze the nail before cutting, creating uncomfortable pressure and potentially splitting the nail. Sharp, high-quality tools cut cleanly with minimal force.
Essential Supplies
Sharp clippers or grinder appropriate for your dog's nail size. Styptic powder or cornstarch to stop bleeding if you cut too short. High-value treats for positive reinforcement. Good lighting to see the quick in light-coloured nails. Non-slip mat for stable footing.
Preparing the Environment for Success
Successful dog nail trimming begins before tools ever touch nails.
Choose a quiet area away from household activity and other pets. Good lighting so you can see what you are doing. A non-slip surface (yoga mat, rubber mat, carpet) for stable footing. A comfortable height so you are not straining. The Stay Put System can provide secure, comfortable positioning.
| Good Timing | Poor Timing |
|---|---|
| After exercise when your dog is calmer | When your dog is already anxious |
| When you have ample time without rushing | Immediately after stressful events |
| During naturally relaxed periods | When you are frustrated or in a hurry |
| When you feel genuinely calm and confident | When you are dreading the task |
Gradual Desensitisation for Nervous Dogs
For anxious dogs, attempting to trim nails immediately guarantees struggle and reinforces fear. Gradual desensitisation builds tolerance through small, non-threatening steps.
Phase 1: Paw Handling (1 to 2 Weeks)
Touch paws briefly during calm moments with no tools present. Hold each paw for three to five seconds, then release and reward. Gradually increase duration as your dog stays relaxed.
Practise multiple times daily in short sessions. If your dog pulls away, you have held too long. Reduce the duration and build back up.
Phase 2: Tool Introduction (3 to 7 Days)
Let your dog see and sniff the clippers or grinder. Touch the tool to paws without using it. Turn on the grinder near your dog (not touching) if using one. Pair tool presence with treats and calm praise.
Phase 3: Positioning Practice (3 to 5 Days)
Position your dog as you would for trimming. Hold the paw in trimming position for increasing durations. Touch the tool to nails without cutting. Reward calm acceptance generously.
Phase 4: First Trims
Trim only the very tip of one nail. Reward immediately. End the session after one to two nails for the first several attempts. Gradually increase the number of nails per session as confidence builds.
This process may take weeks for severely anxious dogs. Rushing through stages guarantees setback. If your dog is not progressing despite consistent, patient effort over several weeks, this is valuable information. It may mean your dog needs professional nail care, and that is a perfectly acceptable outcome.
Step-by-Step Dog Nail Trimming Technique
When you are ready to actually trim, proper technique minimises discomfort.
Positioning
Allow your dog to stand or sit rather than lying down (this feels less vulnerable). Support the paw gently without pulling it away from the body. Keep movements slow, smooth, and predictable.
Never twist, yank, or force the paw into uncomfortable positions. If your dog tenses or pulls away, pause, let them resettle, and try again. If they pull away repeatedly, the session is over.
Trimming Process
Hold the paw firmly but gently to prevent sudden movement. Identify the quick (pink area visible in light nails; harder to see in dark nails). Position clippers at a slight angle matching the natural nail curve.
Trim only the curved tip, removing small amounts. Check the nail end. Stop if you see a dark centre or chalky circle (approaching the quick). Smooth sharp edges with a file or grinder if your dog tolerates it. Reward and release the paw.
How Much to Trim
For nervous dogs, remove only 1 to 2 mm per session. Frequent small trims are safer and less stressful than infrequent large cuts. The goal is nails that do not touch the ground when your dog stands, not trimming as short as physically possible.
Understanding the Quick and Preventing Injury
The quick is the living tissue inside the nail containing blood vessels and nerves. Cutting into it causes pain and bleeding, reinforcing nail trimming fear.
| Nail Colour | How to Find the Quick |
|---|---|
| Light-coloured nails | Quick appears pink inside the nail; stop before reaching it |
| Dark nails | Quick is invisible; trim gradually and watch for texture changes |
| Visual cues | Dark centre spot or grey/pink oval on cut surface means you are near the quick |
Shine a flashlight behind dark nails to sometimes illuminate the quick. Grinders work well for dark nails because gradual filing gives you more control.
If You Cut Too Short
Stay calm. Your reaction affects how your dog remembers the experience more than the pain itself.
Apply styptic powder or cornstarch to the nail end. Apply gentle pressure for 30 to 60 seconds. End the session immediately. Resume practice in a few days, not immediately.
Accidentally cutting the quick happens to everyone eventually. One incident does not ruin progress unless it is followed by forced continuation or owner panic.
Positive Reinforcement During Dog Nail Trimming
Positive reinforcement accelerates acceptance and reduces anxiety more effectively than restraint or punishment.
High-Value Rewards
Use treats your dog rarely gets otherwise (small pieces of cheese, chicken, freeze-dried liver). Reserve these exclusively for dog nail trimming so they create strong positive associations.
Timing Matters
Reward immediately after each successful nail, not just at the end of the session. This marks the specific behaviour you want (calm acceptance) rather than just completion.
End on Success
Always end sessions before your dog becomes overly stressed. One calm nail is better than five forced nails. Stopping while your dog is still cooperative builds trust for next time.
How Often to Trim
Most dogs need dog nail trimming every 3 to 4 weeks.
Signs Nails Are Too Long
Nails click audibly on hard floors. Nails touch the ground when your dog stands. Paws splay or turn outward. Your dog favours certain paws or walks differently.
Benefits of Frequent Small Trims
Keeps the quick shorter (it recedes with regular trimming). Reduces stress by making each session brief. Maintains proper foot structure and gait. Prevents joint strain from altered weight distribution.
For nervous dogs, trimming small amounts weekly often works better than larger amounts monthly.
When to Seek Professional Help
Home nail care is not appropriate for every dog or situation. Choosing professional support is responsible care, not failure.
| Situation | Why Professional Help Is Better |
|---|---|
| Dog freezes, growls, snaps, or shows aggression | Safety concern requiring experienced handling |
| Nails are severely overgrown, curled, or ingrown | May require sedation or specialised tools |
| Dog has mobility issues or joint pain | Positioning requires expertise |
| Weeks of desensitisation without progress | Professional techniques may work better |
| Your own anxiety makes handling unsafe | Protects both you and your dog |
| Dog requires sedation for nail care | Veterinary supervision needed |
If you have been trying desensitisation consistently for several weeks and your dog is not making progress, stop and consult a professional. Continuing to push through resistance damages trust.
Alternative Nail Maintenance Methods
If traditional dog nail trimming remains too stressful, alternative approaches can help maintain appropriate nail length.
Scratch boards teach your dog to scratch a board covered in sandpaper, filing their own nails through natural movement. This works well for front nails but does not address rear nails effectively.
Regular walks on pavement naturally wear down nails, though this alone rarely keeps nails short enough. It supplements trimming rather than replacing it.
Professional grinding works well for some dogs who tolerate grinding better than home clipping.
Common Mistakes to Avoid
| Mistake | Why It Is a Problem |
|---|---|
| Rushing through the process | Taking your time reduces mistakes and stress |
| Forcing restraint | Physical fighting creates lasting fear; damage can be permanent |
| Trimming too much at once | Small frequent trims are safer |
| Ignoring stress signals | Panting, pulling away, whale eye, and tension mean stop |
| Inconsistent practice | Sporadic attempts prevent desensitisation from working |
| Using dull tools | Creates uncomfortable pressure |
| Skipping positive reinforcement | Treats and praise accelerate acceptance significantly |
| Approaching with your own anxiety | Your dog mirrors your emotional state |
Building Long-Term Cooperation
Successful dog nail trimming develops through patient, consistent practice that prioritises emotional comfort over task completion.
Measure Progress Appropriately
Success means your dog stays calmer during sessions, not how many nails you finish. One relaxed nail is better than four forced nails.
Maintain Consistency
Practise paw handling and tool desensitisation regularly, not just when nails need trimming. This prevents skills from deteriorating between sessions.
Adjust Expectations
Some dogs never love dog nail trimming but learn to tolerate it calmly. That is a successful outcome. And some dogs will always need professional nail care. Recognising this is good ownership, not giving up.
Mondo's Pro Tip
If the dog is pulling away, the dog is talking to you. Listen. One calm nail with a treat afterwards teaches more than ten nails forced through a struggle. Patience is not slower. It is the only thing that actually works.
Related Reading
Nail and Foot Care
Handling and Comfort
- The FurHQ Touch Test
- Dog Grooming Brushes: A Complete Guide by Coat Type
Grooming Techniques
The Bottom Line
Dog nail trimming for nervous dogs requires patience, proper tools, gradual desensitisation, and realistic expectations that prioritise emotional comfort over speed.
Before anything else, assess your own energy. If you are not calm and confident, your dog will not be either. If this task makes you anxious, a professional groomer is the right choice.
Never force a dog to submit for nail trimming. Forcing creates lasting psychological damage, permanently imprints fear of paw handling, and destroys trust that is extraordinarily difficult to rebuild.
Start with simple paw handling before introducing tools. Work in short sessions that end before stress escalates. Use high-value rewards. Trim only small amounts frequently. And if desensitisation is not working after consistent effort, seek professional support rather than forcing through resistance.
With consistent, patient practice, most nervous dogs can learn to tolerate dog nail trimming calmly. Some will always need professional handling, and that is responsible care, not failure.
You got this. And we've got you. 🐾
Variation Clarity Statement
Every dog is an individual. Coat density, shedding patterns, skin sensitivity, and tolerance levels vary even within the same breed. The information in this blog represents general guidance based on coat type classifications. Your dog's specific needs may require adjustments to frequency, tool selection, or technique. When in doubt, consult a Certified Professional Groomer familiar with your dog's coat type. If you are unsure about your dog's coat type, use the FurHQ AI Coat Identifier to get accurate identification and the right kit recommendation.
FAQs
How do I trim my dog's nails if they won't let me?
Start with gradual desensitization rather than forcing dog nail trimming. Practice touching paws with no tools for 1 to 2 weeks, rewarding calm acceptance. Then introduce clippers visually without using them for 3 to 7 days. When trimming begins, do only one nail per session and reward immediately. Build up slowly over weeks. If your dog freezes, growls, or shows aggression, seek professional grooming help rather than forcing the issue.
How often should I trim my dog's nails at home?
Most dogs need dog nail trimming every 3 to 4 weeks to prevent overgrowth. If nails click audibly on hard floors or touch the ground when your dog stands, they're already too long. For nervous dogs, trimming small amounts weekly often works better than larger amounts monthly because sessions stay brief and stress remains low. Active dogs who walk frequently on pavement may need less frequent trimming.
What happens if I cut my dog's nail too short?
If you cut into the quick during dog nail trimming, stay calm because your reaction affects how your dog remembers the experience. Apply styptic powder or cornstarch to stop bleeding, hold gentle pressure for 30 to 60 seconds, and end the session immediately. Resume practice in a few days, not immediately. One accidental quick cut doesn't ruin progress unless followed by forced continuation or owner panic.
Should I use clippers or a grinder for dog nail trimming?
Both tools work effectively for dog nail trimming; choose based on your dog's tolerance. Clippers cut quickly but risk cutting too short in one clip. Grinders file gradually with precise control but produce vibration and noise that overwhelm some nervous dogs. Try both and see which your dog accepts more calmly. Quality matters more than type; sharp, well-maintained tools reduce discomfort significantly.
How can I see the quick in my dog's black nails?
You cannot see the quick in dark nails during dog nail trimming, so trim gradually and watch for visual cues on the cut surface. When you see a dark center spot or gray/pink oval appearing, you're approaching the quick and should stop. Trim only 1 to 2 millimeters at a time with dark nails, making frequent small cuts safer than attempting large cuts. A flashlight behind the nail sometimes helps.
Why does my dog hate having their nails trimmed?
Dogs resist dog nail trimming because paws are neurologically sensitive, lifting paws creates vulnerability and balance loss, past negative experiences created fear associations, the pressure and sounds of tools feel unpredictable, or restraint makes them feel trapped. Dogs aren't being difficult; they're responding to genuine discomfort or fear. Gradual desensitization addresses these concerns systematically rather than forcing cooperation through restraint.
Can I train my dog to file their own nails?
Yes, you can teach your dog to scratch a board covered in sandpaper, filing their front nails through natural movement as an alternative to traditional dog nail trimming. This works well for front nails but doesn't address rear nails effectively. Scratch board training takes several weeks of positive reinforcement but provides a low-stress nail maintenance option for dogs who cannot tolerate clippers or grinders.
How do I hold my dog still for nail trimming?
Don't forcefully restrain your dog during dog nail trimming. Instead, allow them to stand or sit naturally on a non-slip surface. Support the paw gently without pulling it away from the body. Keep movements slow and predictable. If your dog struggles despite gentle handling, stop and work on desensitization before attempting to trim. Fighting creates fear and makes future sessions harder.
What treats work best for nail trimming training?
Use high-value treats your dog rarely gets otherwise during dog nail trimming practice, such as small pieces of cheese, chicken, hot dogs, or freeze-dried liver. Reserve these exclusively for nail sessions so they create strong positive associations. Reward immediately after each successful nail, not just at session end. The treat quality and timing matter as much as the quantity.
When should I take my dog to a professional for nail trimming?
Seek professional help with dog nail trimming when your dog shows aggression (growling, snapping) during paw handling, nails are severely overgrown or curled, your dog has mobility issues making positioning difficult, desensitization hasn't worked after months of consistent practice, or your own anxiety makes handling unsafe. Professional groomers and veterinarians have tools, techniques, and sedation options when necessary. Choosing professional support protects your relationship and ensures nail health.
My dog has been through months of desensitisation with no progress. What now?
Seek professional help. A professional groomer has experience, tools, and techniques for difficult dogs. A veterinarian can provide sedation when necessary. Continuing to push through resistance at home damages trust and makes the problem harder to solve. Some dogs will always need professional nail care, and that is a perfectly acceptable outcome.
What is the FurHQ 5-Step Grooming Method?
The FurHQ 5-Step Grooming Method is Audit, Prep, Bath, Dry, Finish. It provides structure for every grooming session so nothing gets missed. The Audit assesses the coat before you start. The Prep phase removes loose coat and addresses tangles. The Bath phase handles cleansing. The Dry phase removes moisture. The Finish phase completes the groom with a final assessment and comb check.